

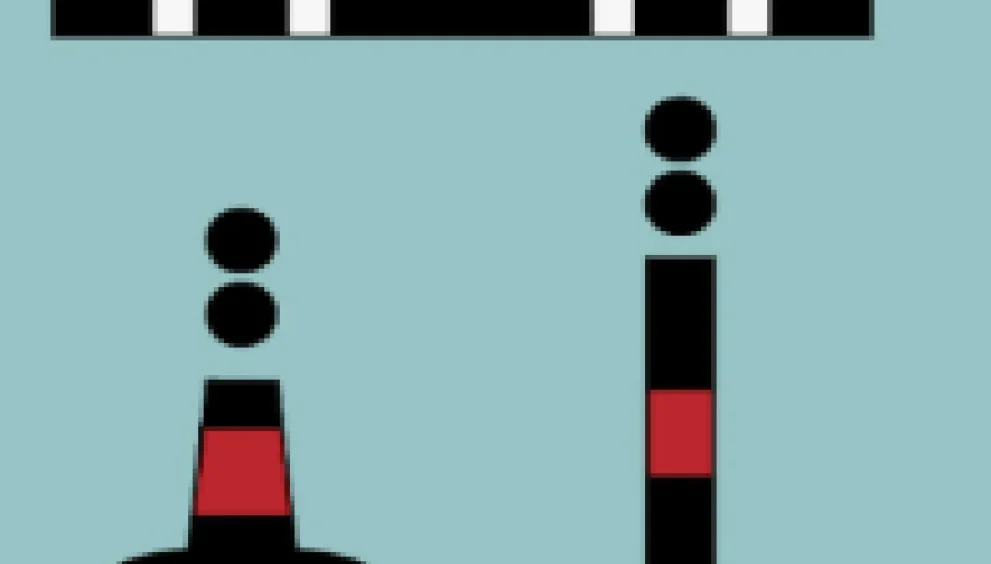
The Isolated Danger Mark is one of the most important buoys in the IALA maritime buoyage system. Its purpose is simple yet critical: it marks a single, specific danger that has navigable water all around it. Understanding its appearance, light pattern, chart symbol, and navigational significance is essential for every bridge watchkeeper, especially when navigating at night, in poor visibility, or in confined waters.
What Is an Isolated Danger Mark?
An Isolated Danger Mark is a buoy or beacon placed directly on top of a small, isolated hazard such as a wreck, rock, shoal patch, or any underwater obstruction that is limited in size but dangerous to shipping. Unlike cardinal marks which indicate safe water in a particular direction, the Isolated Danger Mark tells the navigator that the danger lies at the buoy’s position itself. The key point is that water is safe in every direction around it, provided the vessel keeps a reasonable distance.
Appearance and Characteristics
IALA prescribes a very distinctive appearance for the Isolated Danger Mark. This makes it easy to identify, even from a distance or when partially obscured. The main visual characteristics include:
Colours: Black with one horizontal red band around the middle.
Topmark: Two black spheres placed vertically one above the other.
Shape: Typically a pillar or spar buoy, but may also be a beacon.
Purpose: To mark a danger that is too small to justify larger buoyage arrangements.
These features are designed so that no other buoy can be confused with it.
Light Characteristics
At night or in restricted visibility, an Isolated Danger Mark is identified using its light pattern. Its official IALA light characteristic is:
Fl (2)
This means it exhibits a group of two white flashes.
The period of flashing may vary, but the pattern of two flashes is always consistent.
Examples: Fl (2) 5s or Fl (2) 10s.
The white, double-flash pattern is unique and ensures correct identification during night navigation.
Chart Symbol
On Admiralty charts and ENC, an Isolated Danger Mark is shown with:
A black dot or symbol marking the danger.
Two small black circles representing the topmarks.
Mention of Fl (2) in the chart annotation.
The colour pattern is not shown on ENC, but the symbol shape and text description ensure recognition.
Correct chart interpretation is critical when planning passages in shallow or rocky areas.
Where Isolated Danger Marks Are Commonly Used
These marks are used in situations such as:
Small submerged rocks or reefs that do not form a continuous feature
Old wrecks or wreck masts that present a specific obstruction
Shoal patches with very limited horizontal extent
Pinnacles or isolated underwater obstructions
Remains of structures like piles or old foundations
Because the danger is small in area, a single mark is sufficient instead of a system of buoys.
How to Navigate Around an Isolated Danger Mark
The safe navigation principle is straightforward:
Give the buoy a reasonably wide berth from all sides.
Never attempt to pass extremely close to the buoy.
Check charted depths around the area before passage.
Follow the vessel’s under-keel clearance requirements, especially near wrecks or rocks.
At night, confirm the double-flash light pattern before altering course.
Mariners must also consider wind, current, traffic density, and tug operations in port areas where such marks are frequently placed.
Difference Between Isolated Danger Mark and Other IALA Marks
An Isolated Danger Mark is sometimes confused with Safe Water Marks or Cardinal Marks.
Safe Water Mark indicates the presence of safe navigable water all around, but it is red and white in colour with a single spherical topmark and shows an occulting or long-flash light.
Cardinal Marks show which side the vessel must pass to avoid danger, using yellow and black colours and different flash groups.
Lateral Marks guide the mariner along channels and are directional.
The Isolated Danger Mark, on the other hand, represents a very specific danger directly below it and allows passage in any direction with sufficient clearance.
Understanding these differences helps avoid misidentification in challenging navigational conditions.
Importance of Isolated Danger Marks in Navigation
These marks play an essential role in:
Preventing collisions with submerged hazards
Marking small dangers not suitable for cardinal systems
Providing safety in coastal areas, ports, and inner waters
Supporting small craft navigation in places with many underwater obstructions
Ensuring safety during night, fog, and reduced visibility operations
Even in the era of ECDIS, AIS, and modern radar, visual identification of buoyage remains a vital navigational skill.
Real Examples of Isolated Danger Marks
Typical examples found worldwide include:
A buoy placed directly over a small wreck in a busy shipping lane
A spar buoy marking an isolated rock near a harbour entrance
A pillar buoy above a shoal in a coastal channel
A steel beacon on a reef used by fishing vessels
Each case highlights the need to keep clear and use the buoy as a direct warning of danger beneath.
Conclusion
The Isolated Danger Mark is one of the most distinctive and crucial marks in the IALA buoyage system. It clearly identifies a specific hazard with navigable water all around and warns mariners to keep a safe distance. Its unique colour pattern of black with a red band, its double-sphere topmark, and its unmistakable Fl (2) light characteristic make it easily recognisable both day and night. Every mariner must understand its meaning, appearance, and correct navigational action to ensure safe passage in confined or hazardous waters.