Navigating the open sea isn’t just about following a straight line on a chart. Hazards, channels, shoals, and safe waters all have to be visually identified — often in real time. That’s where the IALA Buoyage System comes in. For the orientation of sailors and bridge watch keepers, these afloat markers are not only useful; they are vital.
But what is the IALA system, and why is it crucial to navigate safely?
What is the IALA Buoyage System?
The International Association of Marine Aids to Navigation and Lighthouse Authorities (IALA) developed a uniform system of buoys and marks to lead ships safely past hazards and into navigable waters. This rule set is what we know as the IALA Buoyage System.
Prior to the IALA system, each country had its own buoy colour and shape, making it confusing — particularly to international mariners. The intention of IALA was to provide consistency and clearness around the world, making the seas safer for all.
Here’s something every sailor needs to keep in mind — the IALA system isn’t the same everywhere. It’s actually split into two zones: Region A and Region B.
Region A encompasses the majority of the globe — Europe, Africa, Asia, Australia, and the Middle East in parts.
Region B covers parts of the world like North and South America, along with a few countries in Asia such as Japan, South Korea, and the Philippines.
What separates these two regions primarily is the lateral marks — or the colours and sides on which red and green buoys are positioned on entering from the sea (inbound).
Region Port Side Starboard Side
A Red Green
B Green Red
So essentially, “Red Right Returning” applies in Region B, while the opposite is true in Region A.
Types of Marks in the IALA System
The IALA buoyage system includes five primary types of marks, each serving a different purpose:
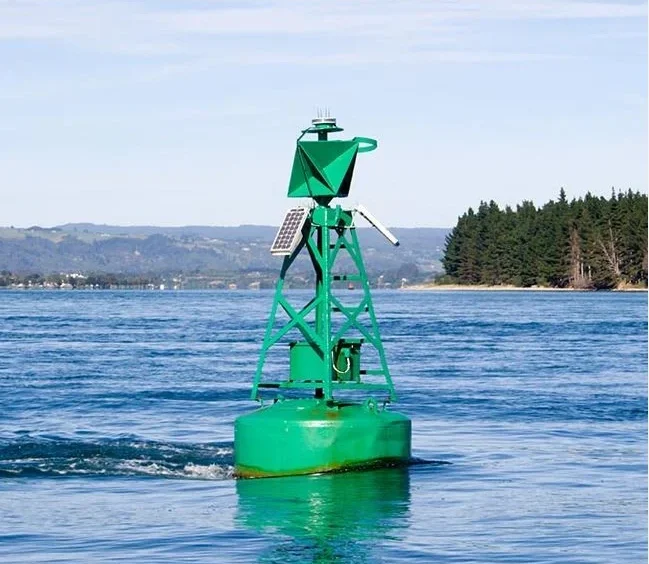
- Lateral Marks
They mark the boundaries of a channel, guiding vessels safely between safe water and potential hazards.
When sailing into a harbour, use the following guide based on your region:
Port-hand markers:
Region A: These are red in colour.
Region B: These are green.
You should keep these to your left (port side) while entering.
They typically have a cylindrical (can-like) shape.
Starboard-hand markers:
Region A: These are green.
Region B: These are red.
Keep these to your right-hand side (starboard) when making your way in.
Usually shaped like a cone.
- Cardinal Marks
These marks show sailors which side offers deep, navigable water when there’s a hazard nearby
There are four types:
- North
- South
- East
- West
Each cardinal mark uses a combination of black and yellow bands and has distinctive top marks (double cones). Their light characteristics flash in groups that match a clock face (e.g., 3 flashes for East, 9 for West).
- Isolated Danger Marks
These marks sit directly on top of a danger, like a rock or wreck, and tell mariners to stay clear.
Colour: Black with one or more red bands
Top mark: Two black balls
Light: White, flashing in groups of two
- Safe Water Marks
These indicate all around is safe to navigate — often found at mid-channel or fairway entrances.
Colour: Red and white vertical stripes
Top mark: A single red ball
Light: White, with an isophase, occulting, or Morse code “A” characteristic
- Special Marks
Used to indicate areas with special functions — like anchorage zones, pipelines, or recreation areas.
Colour: Yellow
Top mark: A yellow X (St. Andrew’s Cross)
Light: Yellow, any rhythm not matching other types
Why This System Matters
At sea, decisions are often made quickly and with limited visibility. Having a globally recognized system of visual cues dramatically reduces the risk of grounding, collisions, or navigation errors — especially in tight waterways or near coasts.
For a sailor, cadet, or officer of the watch, misinterpreting a buoy can mean disaster. Knowing the IALA system is as fundamental as reading a nautical chart or plotting a position.
Real-Life Application: A Practical Example
Let’s say you’re approaching a harbour in Region A. You spot a green conical buoy on your right and a red cylindrical one on your left. That tells you you’re on the correct inbound course — green to starboard, red to port.
Now imagine you’re in Region B. That same setup would indicate you’re going the wrong way into a channel.
One small oversight, different region — big mistake. That’s why knowing your region and recognizing the marks is key.
Final Word
The IALA Buoyage System isn’t just for exam purposes or textbooks — it’s real-world knowledge that can make the difference between a smooth passage and a maritime incident. These floating guides speak a universal language of safety, and every sailor, whether navigating coastal waters or deep-sea channels, must learn to read them fluently.
In the end, buoys don’t just mark water — they mark wisdom earned through centuries of seafaring.